Spent hours for the last two days pasting these wallpapers onto my kitchen cabinet glass doors. It kinda defeat the purpose of having the lights installed inside them, but it's prettier for my eyes now :)
Showing posts with label Home. Show all posts
Tuesday, April 9, 2013
Sunday, December 16, 2012
a DIY christmas
Didn't know what came upon me but i went all out crafty this Christmas.
It might be the result of overdosing myself with pretty pictures of DIYs, gift guides and printable freebies (a.k.a the trifecta of christmas posts on the blogosphere), yet i still find myself obsessively clicking every post that i had not yet read.
These DIYs are resulted from just having the suitable materials i have at home (mostly papers). I rarely buy new ones, unless they're realllly pretty (like the glitter foams). So, dig around your house, don't throw some stuff yet and see what you can do with them. Nothing gives me better pleasure than the satisfaction i get from making my own house decorations.
1. The Tree
Not wanting to put up my old tree out of laziness, i ended up making one. (That sounds contradictory now i just realized). This one is inspired from Brit&Co's post, but instead of buying some washi tapes, i used flower tape. I like it because it literally takes zero space, perfect for a small house like mine. Decorate it with store-bought ornaments or even make them yourself if you're really crafty!
2. Faceted Paper Vase
This one takes a bit more effort but it was worth it. Inspired from Oh Happy Day
i had it modified to a bigger size so it would fit my vase. Using metallic sparkly wallpapers, it is perfect as a table decoration all year round. As for the stars, i doubled the patterns provided on the web and turned them into 3D ones, prettier when hanging em up i must say!
3. Cardboard Christmas Tree
Again using some leftover card boards, these would be nice when covered in chalkboard paint and used as menus when i do my annual Christmas breakfast gathering with my sisters and their families.
4. Poinsettia Wreath
Never thought i would find myself making one of these, but after the faceted vase, i don't even know myself anymore..*lol*
I used a spray-painted embroidery hoop and a white wallpaper with gorgeous texture as the base. The wreath is inspired from this post.
5. The one who started it all...
Who knew hanging some ornaments on the wall could really got you in the whole mood of decorating? The happy feeling i get from seeing these baubles hanging was enough to get me started in going on this whirlwind of house decorating.
Of course, i just had to add the cut gold glitter foams as the "sun beam".
I'm not finished though...
I still want to make some himmeli which hopefully will be done before Christmas. I hope you're inspired to decorate after reading this post. Happy holidays!
Tuesday, October 23, 2012
scrapfridge
...is the right term to describe what I've been doing to my fridge doors.
New additions, that made me change the whole layout of my "scrapfridge" recently, including:
The first good thing about using your fridge doors as a "scrapbook" is that NOTHING is permanent (i use magnet buttons, blu tacks, etc) hence:

![]() |
| "scrapfridge" |
I use them as a "scrapbook" to display my bric-a-brac.
What are they is mostly cute-dont-know-where-i'll-put-it-but-will-buy-it-anyway things, and some curious-but-lets-see-how-it-works-out crafts, because apparently i'm only attracted to certain types of crafts.
I dig paper (obviously) so you'll see LV floper and vantiani 's postcards, among some holiday photos & polaroids, but... i don't go gaga over cartoon-ish colorful soft toys, hence you only see idekuhandmade 's voodoo dolls there :D
New additions, that made me change the whole layout of my "scrapfridge" recently, including:
![]() |
| hand-drawn cards from taiwan |
![]() |
| "kue basah" felt toys from hoshi craft |
The first good thing about using your fridge doors as a "scrapbook" is that NOTHING is permanent (i use magnet buttons, blu tacks, etc) hence:
- i can easily change the layout (which i usually do after a few months)
- there's always space for more things (double-doors are the best!)
- it doesn't get messy because no glue/paint/powder involved
- i don't spend on "unseen" things like glue, paint & powder
- aaand... it is a 24/7 display at home (which always got my guests curious and take a closer look)
Because the truth is i'm intimidated by doing a real scrapbook (there i said it!), and i'm a minimalist at heart, but on these steel surface i feel that i can just "let go" and jumble and pile things anyway i want them.
To fill the whole doors is the step i'm taking slowly because it will surely be an enjoyable one. I encourage you to do the same to your fridge doors!


Thursday, September 6, 2012
Handmade Gift Ideas: Deer Wall Mount
I can sense this blog is driving more towards home decors lately, but i can't help it since i spend most of my time being in one. These one-off projects have been a great creative escape from the usual things i make for paperpleased and truth to be told, it's kinda addictive decorating your home with something you make yourself.
I find myself constantly adding and moving things around in my house. Always looking for that one more spot to add a new DIY. After all, one produces beautiful work by surrounding oneself in beautiful things, no?
And so...i've been looking for something to fill the blank spot above-the-tv on my back wall. At first i wanted a taxidermy, but since i couldn't find a local seller here i let that one go pretty quickly. My second thought was a painted-in-one-color cuckoo clock. Again, finding none that suits my ridiculous super tight budget, i finally decided to make my own that combines the look of taxidermy and a functional clock.
Meet my wallpapered Deer Wall Mount...
![]() |
| wallpapered deer wall mount |
This one is measured 50cm x 42cm (including shield).
I spent two days making it using foam (had to leave the glue overnight), cardboard and 3 sheets of wallpaper. It's very light and you only need to stick it using 3M poster strips and some blue tacks. Hence, no drilling required!
Saturday, August 25, 2012
bedhead makeover
There is usually one room in the house that always gets left-out when you're busy decorating the others, right?
For me, it's the guest room.
Located downstairs and adjacent to my dining room, my small guest room had been left out in my experiment with DIYs due to its gloomy color scheme of dark brown and grey. It was in need of some color love.
Not wanting to do anything major (e.g. repainting the wall) or anything that requires a lot of labour, i remember my dad's collection of unused haveel
chip samples that were literally just stacked under his desk. Unused.
To
keep the same color scheme going within the room, however, i selected the wood-grain ones which are commonly used to give furniture that authentic "made-of-wood" look. I arranged them and sticked them
one-by-one on the bedhead with a trusty double-sided
tape.
Maybe i should have used a more appropriate adhesive, but i
didn't really wanna ruin the original haveel that had been pasted on the
bedhead, and the fact that i was too impatient/lazy/stingy to purchase a new adhesive *lol
| before... |
After 45 minutes, i can imagine seeing this bedhead on Anthropologie webstore *heehee
Wednesday, August 15, 2012
"hello, sunshine"
With the coming of Eid-Fitr holiday and having no assistant still, i decided to take a long break during this month of August. Being fidgety however, I decided to use the time to do some decorating around the house. First one to tackle: Nail and String Wall Art.
![]() |
| picture taken from jenloveskev |
It was love-at-first-sight project, although it was not as easy as it looks...
Since i was doing it in on a rather big wall (2.8 x 1.8m), i had to get the correct size of the letters by printing and arranging them one by one in order to get both words straight and evenly spaced from side to side.
I also called someone to help me doing the nails because i couldn't do it myself. No matter how straight my banging was, the nails end-up dented, and with this size of wording, i needed A LOT of nails and hand power.
| arranging the letters |
After a few tiring hours and a sore neck (of looking up for hours), i'm super proud with what i see...
| see the little nails? |
| i put shiny "caps" to make it pop |
| my own nail and string wall art |
I dont know if you can see it, but i put shiny "caps" on the word "sunshine". They look really nice reflecting the light from the window at night.
Safe to say, i cured my phobia of nailing walls after this project!
Monday, April 2, 2012
hydrangea
Discovered this row of fresh-flowers-sellers at Kemang accidentally yesterday, i almost jumped out of my seat and shout in excitement at hubby's ear to pull over. Too bad i didn't get any pictures because it was raining, but will surely come back to get me some Forget-Me-Nots next time.
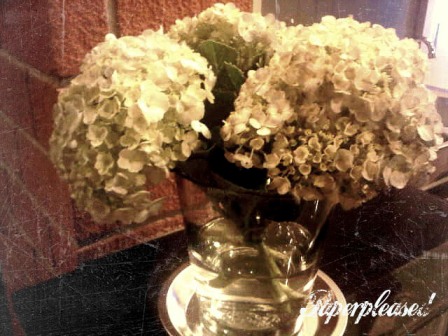
Back home, i put the hydrangeas in a thick glass vase with some sugar in the water (I read somewhere that helps fresh flowers stay longer). On display were two flower-theme cut-outs from Frankie magazine.
Wouldn't it be great to have new fresh flowers every week at home? Happy Monday everyone!
Sunday, April 1, 2012
couch makeover
I've had samples of upholstery and curtains fabrics piling up on my room for months and it only struck me recently that i could use them to give a much-needed makeover to my couch!
Finally i gave my couch that flea-market chic touch i always adore...
Using four different fabrics for each stool allowing me to get a different look every time i turn them around. I'm quite pleased with the way they look.
Finally i gave my couch that flea-market chic touch i always adore...
Using four different fabrics for each stool allowing me to get a different look every time i turn them around. I'm quite pleased with the way they look.
Monday, March 19, 2012
the decorator in me
Being a new house owner (two years and counting...) definitely led me to a decorating frenzy. The satisfaction
comes mostly from finding things that don't break the bank but give the most impact.
Some of my new favorite buys...
1. A4-frames, that i use to display a collection of old money and stamps, as well as some quirky illustration cut-outs from magazines.
![]() |
![]() | |||||
2. Tin cans for storing stationeries
3. Fold-able shoe-rack that saves much more space by allowing each pair to be put on top of each other.
![]() |
4. Trays for grouping of things and hence give a neater look to the tables. I have wooden, rattan, aluminium, and now, steel.
Saturday, March 3, 2012
craft studio
This is probably one of those dream-comes-true moments for me.
Been toying with the idea of having my own craft studio for months, but somehow i never gave it enough time to sink-in, thus it just sat happily in the corner, occasionally nudging to remind me that she's still there.
Well, after many nights of browsing pinterest and reading "Studios" careful thinking, i decided to give it a go.
We have this room we called "office", with a couch and a TV rack inside (yes, that kind of "office") that were rarely used. It would be the perfect space for a craft studio, thanks to its natural light.
It doesn't take a genius to realize how much neater the house would be if there was a proper room for all my sh*t, really. My stuff is filling up quickly, it reached a point where the
moment we stepped into the house, you can see piles of papers hung on
the shoe rack.
My husband, being the wonderful guy that he is, had been coping with it very well and occasionally joked how the whole house has turned into a factory/ sweatshop since i started Paperpleased.
But that's about to change...
![]() |
| old "office" |
![]() | |||
| piles of papers |
![]() |
| my other "emergency"storage room |
![]() |
| what-used-to-be the dining table |
Two weeks after discussion with my step-dad (the architect / go-to guy for all my house woes), the furniture was installed and I was ecstatic with the result.
I have so much room now, that after storing all my stuff i still have space on the what-feels-like the never-ending shelves. I could tell that my assistants were happy working in the new studio too. Not to mention my husband.
(See, why didn't i do this sooner?)
I'm still waiting for the peg wall to be installed (when it does, will post another pic), but at the moment, let me just share some pictures of the newly-renovated "paperpleased"
Now, i'm currently on the look-out for some pretty baskets and storage to decorate it. Looks like this will be a long and enjoyable process...
![]() |
| view from inside |
![]() |
| view from outside |
Tuesday, September 20, 2011
green-eyed
I've been indulging myself in a lot of brainstorming for decorating lately.
From wanting to change my living room's concrete ceiling into a glass one (how i wish) into adding a modern divider that would separate the living room and the dining room (this one just has to wait). But the thing that's been on top of my list lately was... a garden!
I have a 3m x 3m front yard that was just planted with grass before, and i'd been wanting to do something about it. After googling pictures for hours (but who's counting?) for inspiration, i showed my step dad the design that i wanted. Being an architect, he was able to draw it professionally and gave a proper instruction to his men to do the job. Do you know you have to layer the space with stones, sand, and fibers before putting the soil? I had no idea about this, and apparently so did his men before being told. So I guess I'm very lucky to have him :)
Here's some pictures that i kept for documenting purpose.
![]() |
| the inspiration |
| design-concept frm dad |
![]() | ||||
| after digging |
![]() |
| putting the tiles |
![]() |
| paving done! |
The whole process took about three weeks before the big Idul Fitri holiday, and during the holiday in Australia i found myself obsessing and going ooh-aah over some trees and plants at Kings Park (Perth) and Abbotsford Convent (Melbourne) wishing i could take them home with me. I totally recommend these two places if you're visiting both cities, they are just one of the luxuries, among others, that we sadly don't have in Jakarta.
![]() |
| abbotsford convent - imagine seeing this in front of your eyes everyday |
*i don't have a good enough picture of Kings Park in Perth, but please google it and you'll get the idea*
So after we got back home, i felt i was ready to shop for some plants. Real plants. Together with hubby, we chose the plants that we find attractive, not forgetting the condition that they have to be easy-to-care and low maintenance *haha*
Today, the plants have arrived and i had a good time watching the gardeners arranging and planting them into pots to be put outside and inside the house. We are now proud owners of 15 different kinds of plants in a small-but-lovely garden. Yay!
| just arrived |
| arranging & planting |
Subscribe to:
Posts (Atom)